By Tyler Grace
The consequences of a failed window installation
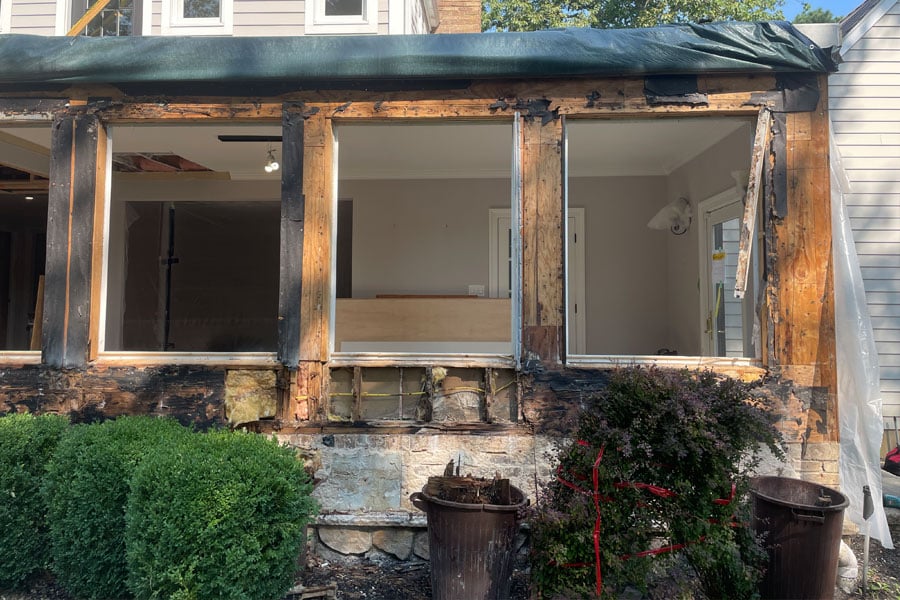
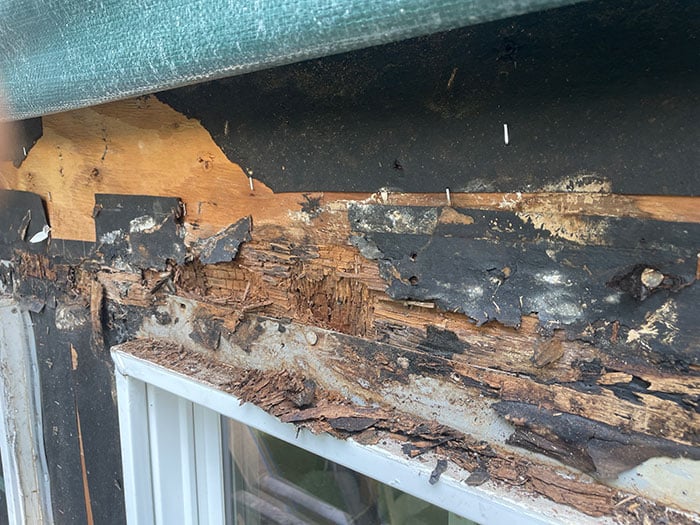
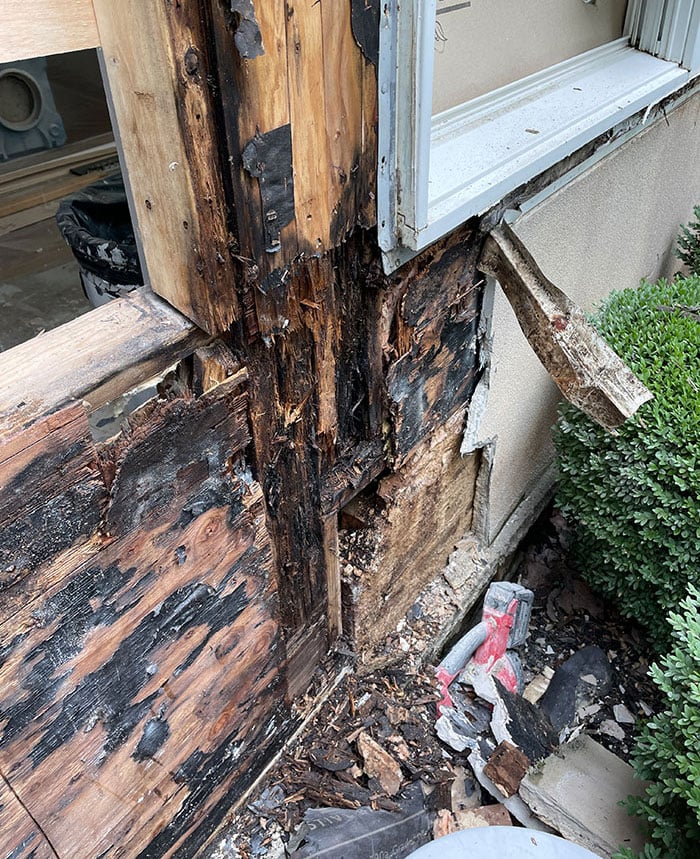
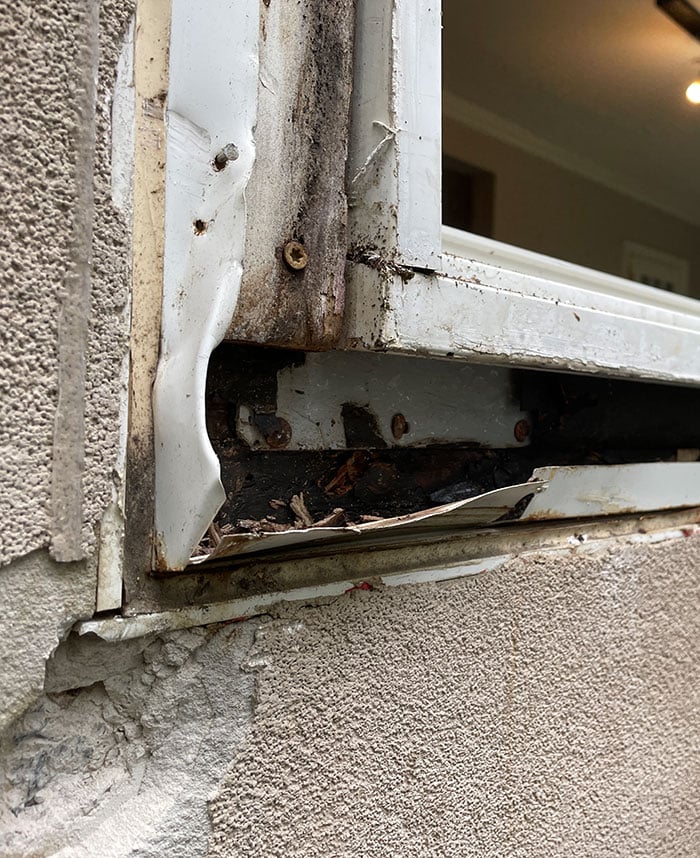
No matter how well a window is made, it will not perform properly if it is not installed properly. I recently encountered some poorly installed windows on a remodel project. The exterior was traditional stucco, so at first glance we had no idea the extent of the damage. Once we started to remove the layers, we uncovered a slew of mistakes. There were no head flashings, the flanges were not back-caulked, there was no drainage plane behind the stucco, they had taped the bottom flanges of the windows, they had not integrated their sill pan flashing into their weather resistive barrier (WRB), layering of tapes and WRB’s were incorrect, and they caulked any sign of a leaking after the fact which only exacerbated the issue. Let’s dig into why these mistakes were so costly and go over some keys to proper installation.
Head flashing
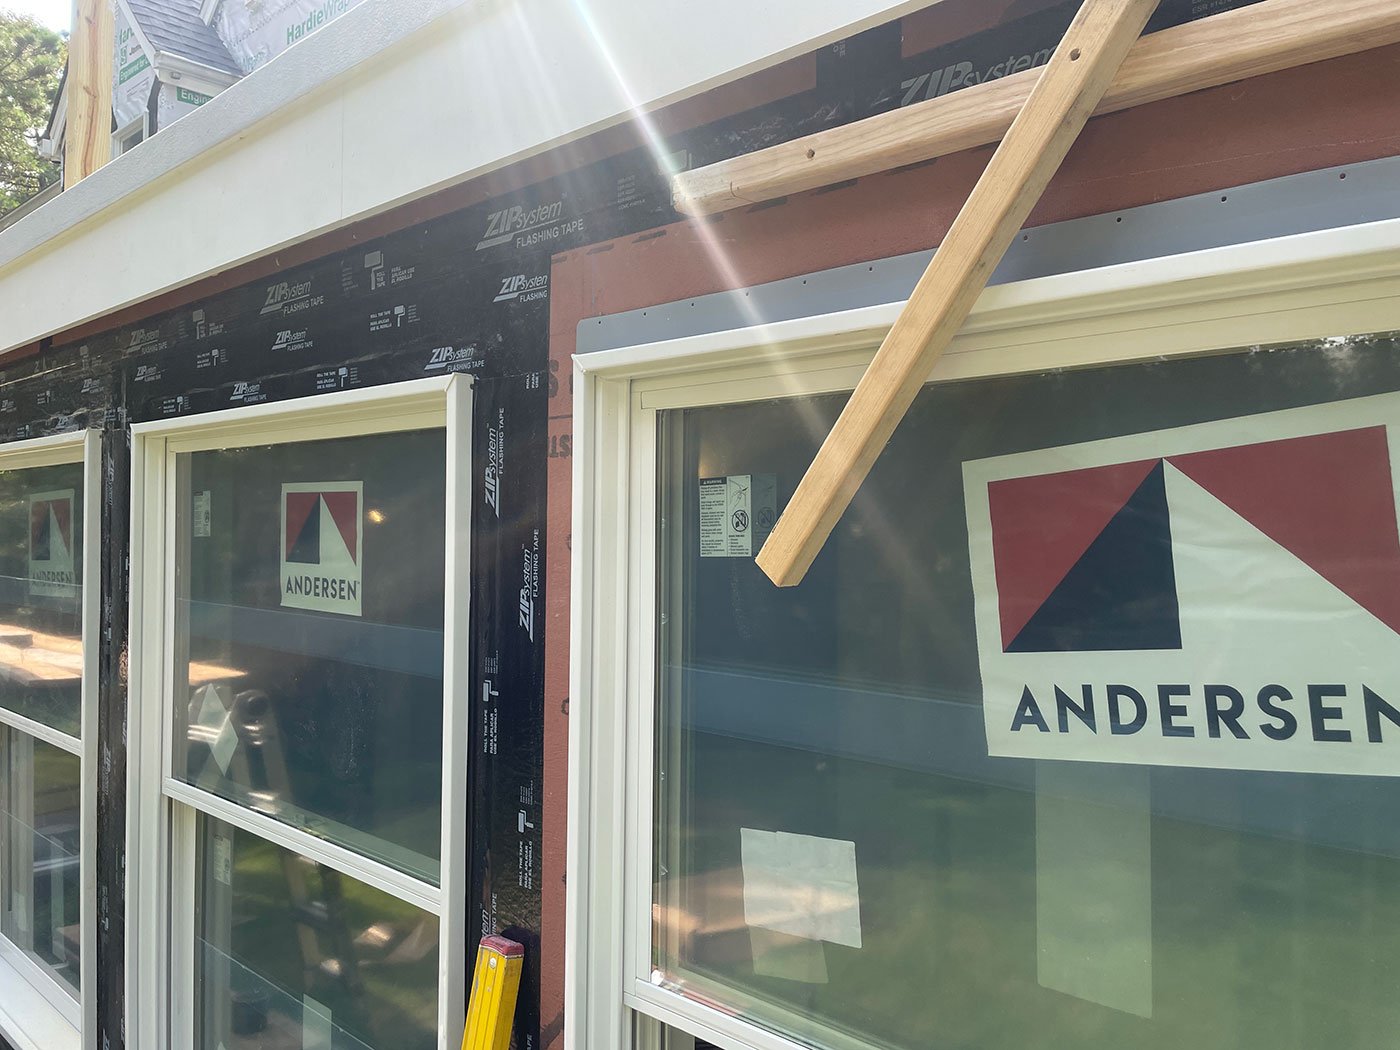
A head flashing is used to divert water away from the head jamb or head trim on a window. This is an extremely important detail because when water runs down the exterior of a building, the head jamb or trim above the head jamb takes the heaviest beating. If the bulk of the water is not diverted away from this area, even with adequate flashing and waterproofing at the window flange, water may infiltrate. These flashings can be made of rigid metal or vinyl. They must be properly integrated into your flashing tapes and WRB in order to work properly.
Back caulking
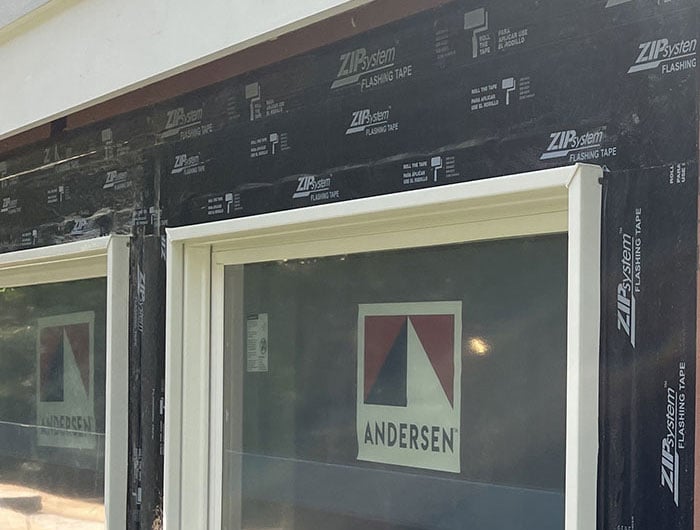
Not everyone back- caulks window flanges, but for me it is an additional line of protection. Adding sealant behind the flange serves as the secondary line of defense for water and is a prescribed step in Andersen’s installation guidelines. The primary seal in a flanged window installation is the flashing tape over the flange. If water migrates through any/all of your other layers, the sealant behind the window flange can serve as a last line of defense against water and air. I apply the sealant on the top and sides of the opening, but it is critical to not apply the sealant to the bottom flange if you want water to be able to drain out of that area. No matter what we do, water will at some point infiltrate our openings, and we must ensure it has a place to escape.
Drainage plane
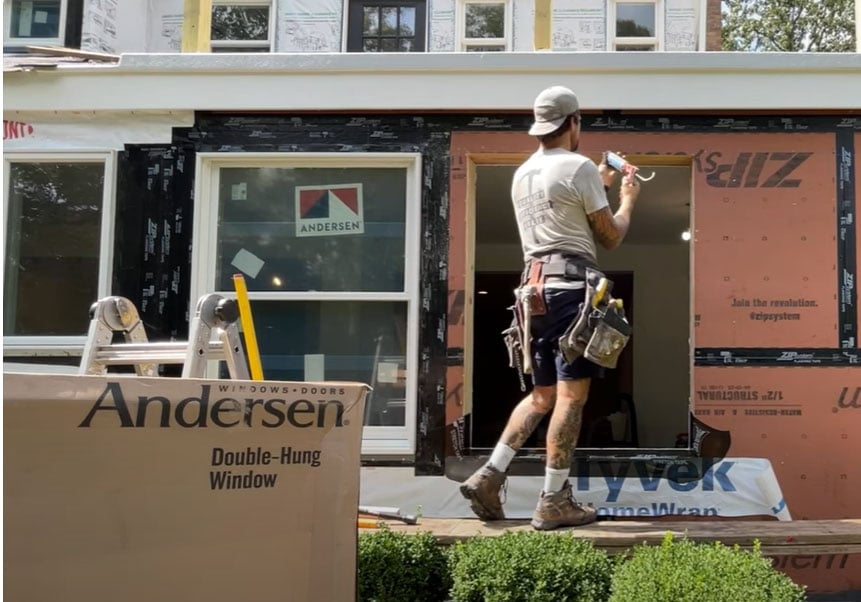
These days, many exterior finishes require the use of an exterior drainage plane, mat, or system behind them. We are building our homes tighter than ever, and we must make sure water has a place to weep out from behind our facade. I view siding and exterior finishes similar to tile; it is not waterproof and is not intended to be. It is there for aesthetic purposes, and all that lies beneath the finish must not only be air and watertight, it must also allow for drainage. This is the purpose of these drainage planes — to shed the water that gets behind our exterior finish and not trap it.
Drainage method (i.e. leave the bottom flange untaped)
If the goal is to seal a new construction window to the exterior of a home, why would you not want to tape the bottom flange? Imagine an exterior wall assembly with a window installed tightly to the sheathing. If rain were beating against that wall from directly above, from an angle, or even from the side, would it be possible for that water to travel upwards and under the bottom window flange? No! Water will enter the flange at the top and sides, but not the bottom. This is why it is not critical to tape that flange. Now, what happens if water compromises the window or wall and gets behind those flanges? It will travel down the wall and hit the rough sill, and at that point, it needs somewhere to go. By leaving the bottom of the window untaped, we are allowing any water that might otherwise be trapped to instead drain down the wall, which is why it’s called the drainage method of installation.
Sill-pan flashing
This entire area and detail is where I experience and witness most issues with window installations. If you are using traditional sheathing and a separate WRB, you must make sure that your sill-pan flashing laps over top of your WRB. If the home has yet to have WRB installed, you must install a small piece of that material under the window for your siding contractor to tie into. I often see the sill-pan flashing or tape applied directly to the sheathing and then the WRB is installed later on top of that. Where will all of the water that is traveling down the window go in that scenario? Directly behind the WRB. Understand your finishes: Account for later trades by integrating your WRB into your sill-pan flashing.
The sill-pan flashing was installed first on our project, which led to the tar paper being installed after and on top of the sill-pan flashing. The water simply ran down the window and sill and then directly behind the WRB.
Proper layering
The simplest way to explain exterior waterproofing is to visualize fish scales. Each row of scales is covered by another row on top of it without the need to seal the bottom of the scales. Our flashing and our WRB’s must mimic this detail. You should start at the bottom and work your way to the top, layering each detail on top of the next and ensuring the bottom has the ability to drain. Any lapse in this detail will create a leak point, and then the water will be trapped.
The layering on our project had no rhyme nor reason. This led to additional leaking, as well as trapped water. This in turn led to rotted sheathing, rotted framing, moldy insulation, drywall, and trim.
Sealant alone is not waterproofing
Sealant should never be used as a waterproofing detail. It has a service life, and it is not a robust or durable material. Once you discover a leak, there is no way to “fix” it with sealant. This “fix” oftentimes makes things much worse. Once you start applying sealant to the exterior of a home, you start trapping even more moisture, leading to more rot. Rather than attempt to slap a band-aid on the issue, fix it the right way.
Most of the exterior trim on our project was sealed on all four sides. This was all done after the fact. If the windows, sheathing, and envelope were properly detailed and waterproofed, there would be no need to apply sealant to these areas other than for aesthetics or paint. To allow water to escape, I would rather see tight joinery and no sealant. In our instance, all of the sealant led to additional trapped moisture and rot.
The Takeaway
Regardless of what line of windows were installed in this home, they never stood a chance at keeping any water out. Couple that with all of the mistakes that prevented the water that got in from getting out, and there was a substantial rot in a short amount of time.
Whenever you are working on the exterior of a home, you must consider every decision that you are making and how it will affect sequential tasks and trades. This is not rocket science, and it is not difficult if you understand the basics. Keep bulk water out as a first line of defense. As a second line of defense, integrate a system for allowing water that eventually does migrate past finish material to escape. This will make sure that windows stay leak- free and homes do not rot.
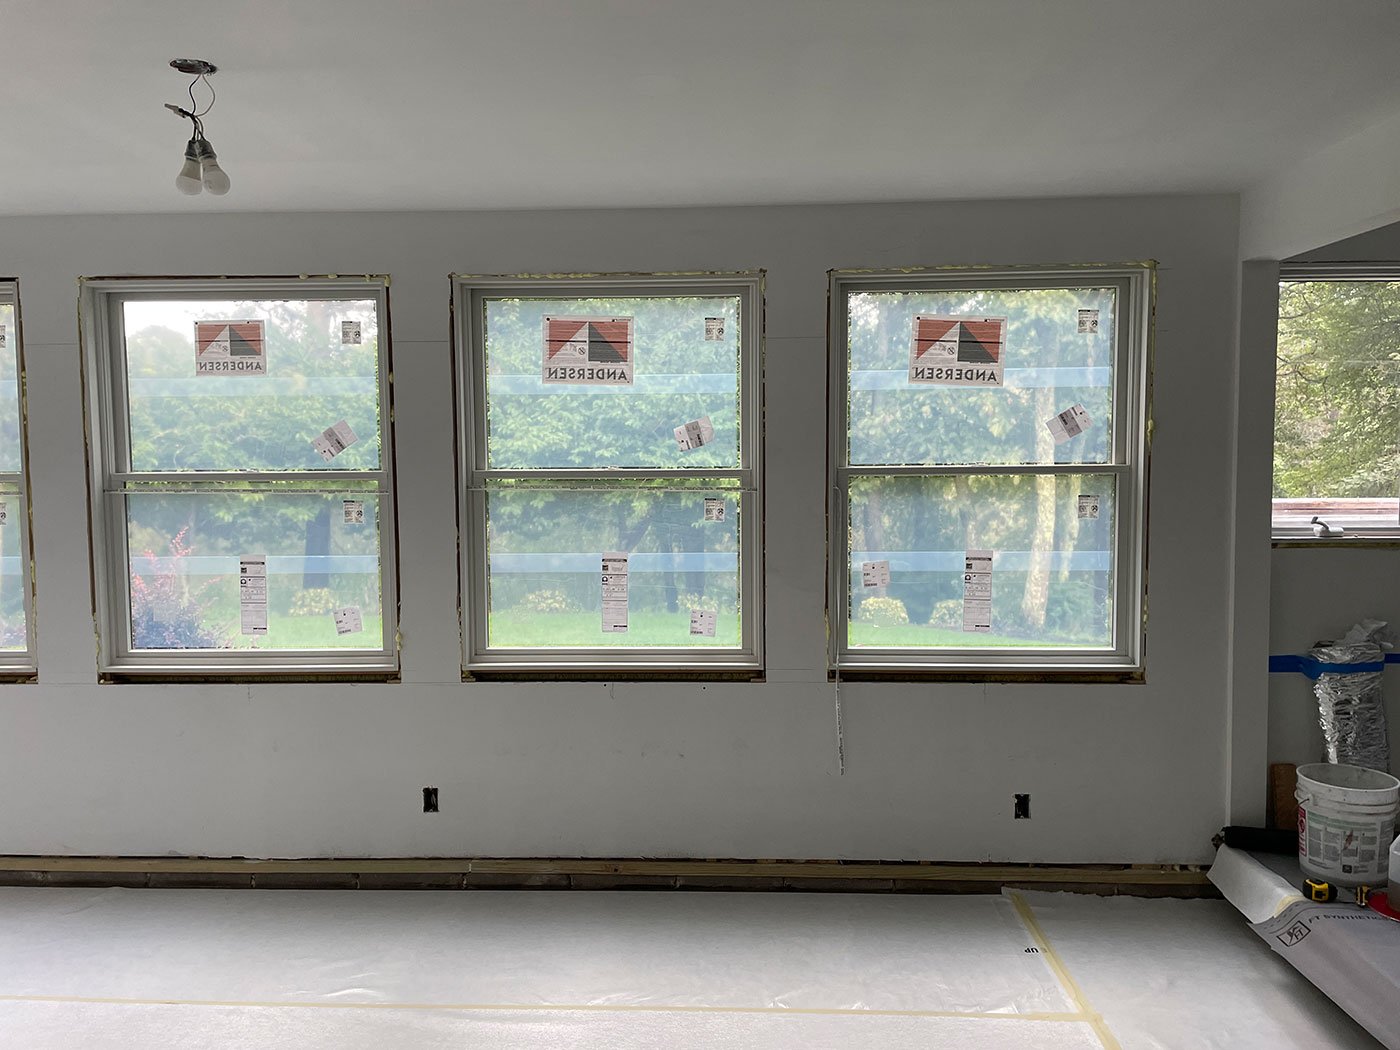
See the full install for yourself
Note: This is an overview of a window installation. This process was selected by the contractor and may not be right for all applications. Always read and follow the unit instructions for proper installation.
Up next

BY RANDY WILLIAMS
5 Tips for successfully installing windows
In his nearly 30 years in the construction industry, Randy Williams has seen a lot of window installations — both good ones and bad ones. In this article, he’s sharing his top tips for avoiding common mistakes and installing windows successfully.

BY RANDY WILLIAMS
Understanding control layers: A fundamental of building science
Ready for a crash course in one of building science’s core concepts? Get to know the four control layers and how they relate to your construction plans and window and door choices in this piece by guest contributor Randy Williams.
Meet Tyler Grace
Owner of TRG Home Concepts in Medford, NJ, Tyler is an interior remodeling contractor focusing primarily on kitchens, bathrooms, and finish carpentry. His mission is to deliver a quality product to his clients while creating and maintaining value through efficiency and judicious project coordination.
