Inside a MultiGlide™ Door installation

We’re taking you through some key details of installing a pocketing MultiGlide™ Door with automation in this episode of Onsite with Andersen. 
A man installs a MultiGlide door panel into a rough opening.
Join us as we get into some crucial details of installing a three-panel MultiGlide Door with Andersen Territory Service Manager Kevin Forrest.
When installing a new window or door product, always follow the instructions available through our installation instructions configurator.

Installation recap

In the video, some of the key steps required to properly install a MultiGlide Door were highlighted, including the following.

Inspecting the rough opening

When Forrest and the crew inspected the rough opening for level, they found it was tipping in, so they added layers of FlexWrap™ at the back to bring it to level. Then, they added a final layer of FlexWrap flashing to act as the water barrier.

Flashing the rough opening

They sealed the bottom of the sill, taking care to seal each seam and the flashing tape with sealant. Then, they flipped it over and applied weight until the sealant oozed out. Finally, they screwed the sill to the wood subfloor and sealed around the screw holes.

Tip: When lining up the sill in the rough opening, you can reference off the outside or inside.

Installing the interior riser back dam

They turned next to the interior riser back dam for the pocket, which will capture any water that gets into the pocket and keep it from leaking out. To prepare the riser back dam, they applied sealant to the bottom side of the riser and to the frame. Then, they installed the riser back dam inside the pocket.

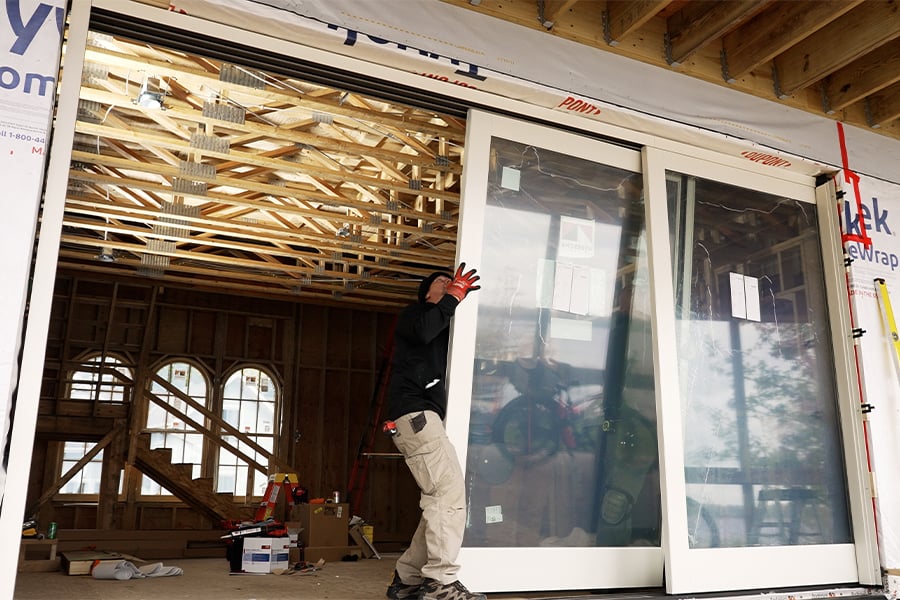
Installing the side jamb

With the head jamb in place, they then focused on the side jamb, starting by dry fitting it into place. Next, they sealed the back of the side jamb and put it in place. One critical place to seal is where the side jamb butts up against the sill flange to prevent rain from leaking beyond the sill. To seal this spot, they ran a bead of sealant along the furthest edge of the sill horizontally and up both sides vertically. Then, they set the side jamb into place, lining up against the inside, and screwed it into place. Finally, they sealed the side jamb to the sill.

Installing the pocket interlock

On the exterior side, Forrest snapped on the head key. He then applied sealant to the already installed sill key at the bottom and fit it in the bottom of the pocket interlock. He then fit the top of the pocket interlock into the head key. They checked for plumb, shimmed the exterior side of the pocket at every pre-drilled hole, and finally screwed it into place.

Installing panels and sealing the pocket

With the frame, sill, one side jamb, head jamb, and pocket interlock all in place, they turned to installing the panels in the tracks.

Installing the motor

This installation differed from the norm in that the construction of the space didn’t allow for the motor to fit on the pocketing end. So, they installed the motor in the wall next to the locking jamb with a special pulley on the pocketing end. They ran the belt around the pulleys, corrected for the right length, cut it, and secured both ends to a term buckle.

Tip: To make the process of aligning the belt easier, they loosened the set screws on the motor so it would float. Once the belt was in place, they went back and tightened the screws on the motor.

Testing the motor

With the belt in place, they tested the panels by moving them manually. In the process, they discovered the pulley was too high on the pocketing end, causing the belt to rub against the frame. They solved the problem with a shim.

Connecting the motor to the door

Once they were satisfied the belt was operating properly, they closed the door manually and connected it to the motor.

Up next: Dig into more details of the MultiGlide Door, or get some expert tips on selecting the right big door for your project.