Tips
Do you need a storm door?
What is a storm door?
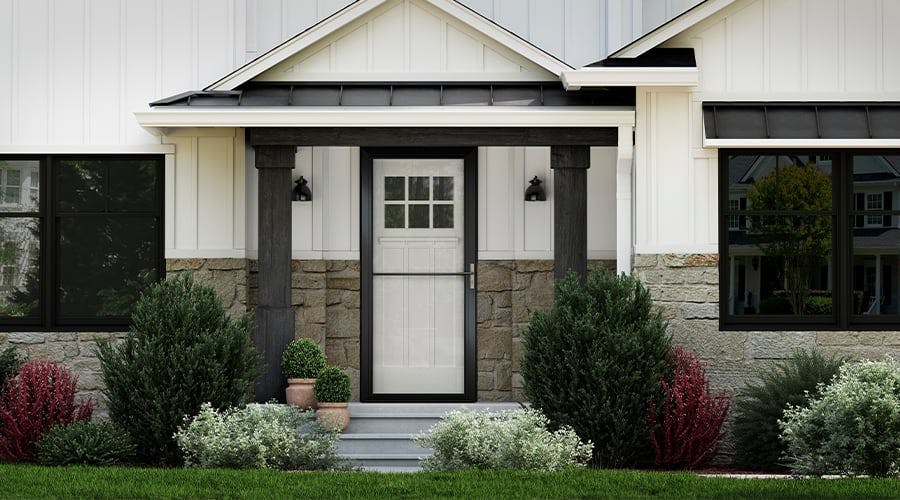
A storm door is an outer door installed over a front entry door or other external door. It comes with the following benefits. It can help keep the elements out — wind, rain, and snow — for improved energy efficiency in the entryway. It can increase your home’s curb appeal by framing your entry door — a variety of styles, colors, and hardware options are available. It allows in fresh breezes for a more comfortable interior during the warmer seasons. Finally, select options can provide an extra layer of security due to their keyed deadbolt and the option to add laminated glass.
What makes a quality storm door?
Perhaps you have an image in your mind of what a storm door looks like — it might be rickety, off-kilter, and unattractive. We get it. We’ve seen those doors too, but better options are available.
Here’s what sets a quality storm door apart:
Solid frame: Our frames are made of thick aluminum with reinforced corners that hold their shape and help enable smooth operation over time. Select doors have double layers of weatherstripping that help improve energy efficiency.
Premium hardware: Both modern and traditional options are available in a variety of colors and metallic finishes. Keyed locks include deadbolts.
High-performing glass: Depending on the door chosen, a variety of glass options are available to meet your needs, including:
- Laminated glass — helps muffle sound and breaks less easily than normal glass for added security.
- Low-emissivity (Low-E) glass — coated to help reflect the sun’s heat in a way that makes your home more comfortable.
- Insulating glass — made up of two panes with an air space in between to help improve energy efficiency.
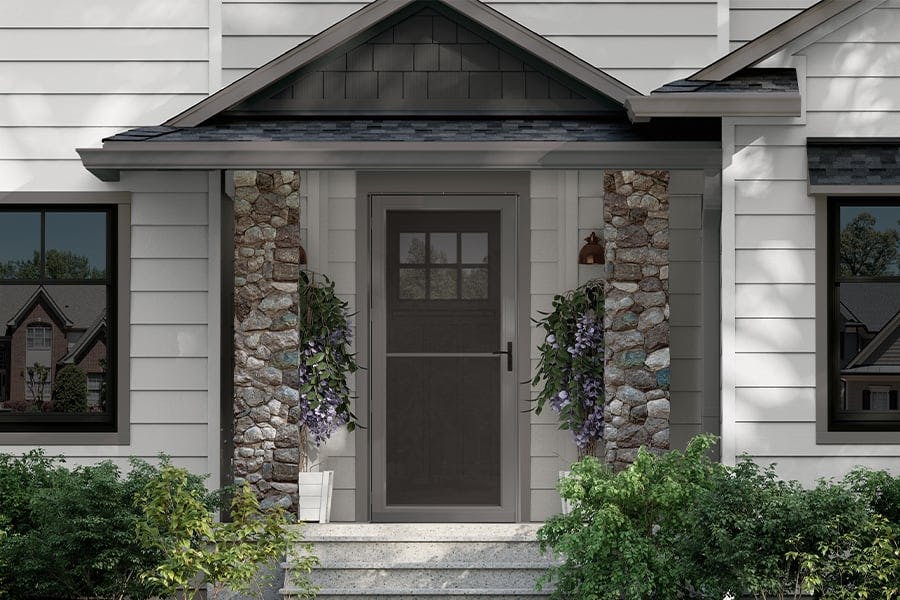
Did you know? Our storm doors are available in a variety of beautiful colors, including a new option in charcoal gray (show below).
Styles of storm doors
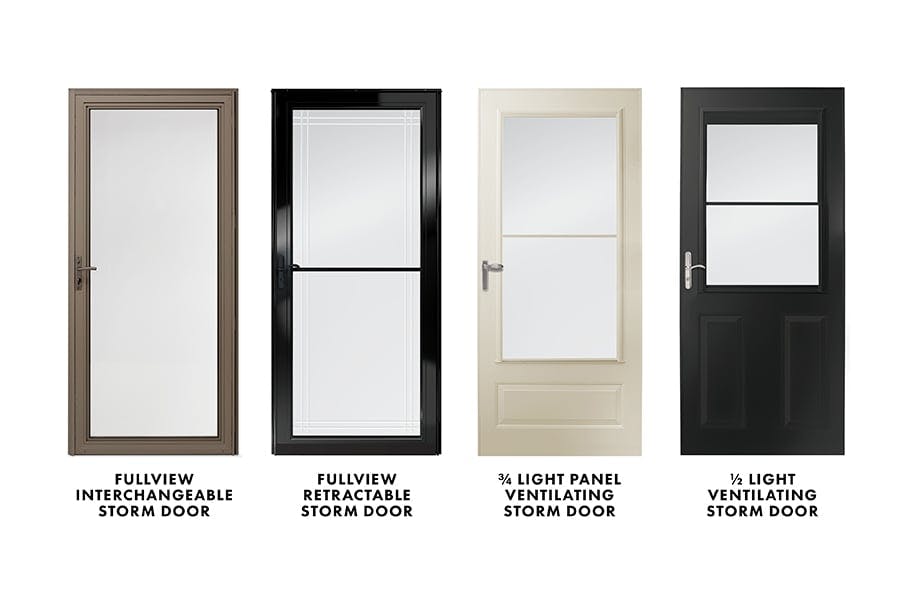
We offer four storm door styles, so there’s definitely one for you. Each door is named according to the amount of glass included in the panel:
- The Fullview Interchangeable Storm Door has a full panel of glass.
- The Fullview Retractable Storm Door also has a full glass panel, but it's split in two to include a built-in retractable insect screen.
- The ¾ Light Panel Ventilating Storm Door has a glass panel that runs most of the door’s length.
- The ½ Light Panel Ventilating Storm Door has a classic look and room for a pet door.
Keep reading for more details about each style.
We offer four styles of storm doors. Their names refer to the amount of glass featured, so Fullview Interchangeable and Fullview Retractable both include full panels of glass, ¾ Light Panel Ventilating includes a ¾ glass panel, and ½ Light Ventilating includes a ½ glass panel.
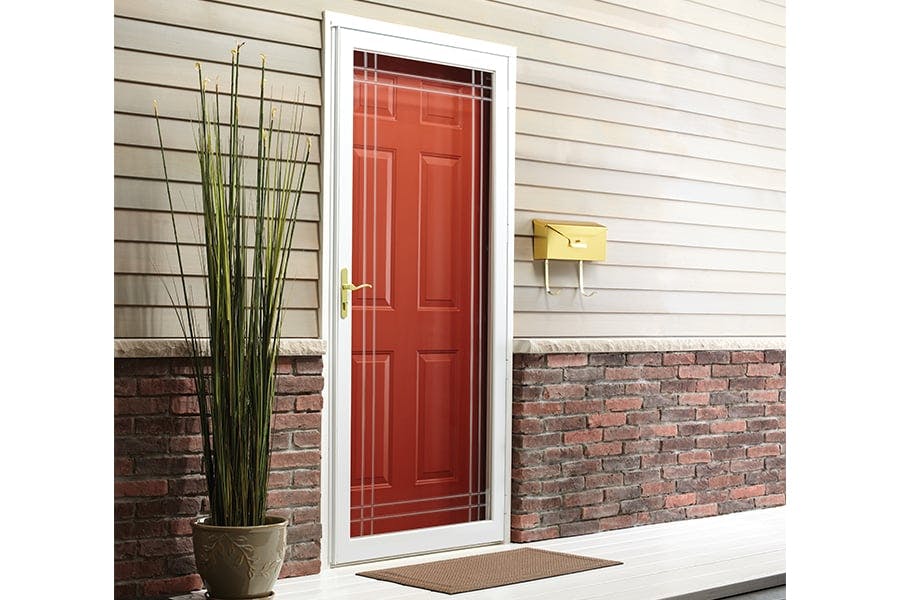
Fullview Interchangeable Storm Door
If you want a storm door that will let in a ton of natural light and show off your front door, this one’s right for you. It has a glass panel that runs the full length of the door with a narrow frame around. If you want an insect screen, that’s no problem, just select one of the options that allows you to swap out the glass when the weather warms up.
Get a side-by-side comparison of all our Fullview Interchangeable Storm Doors.
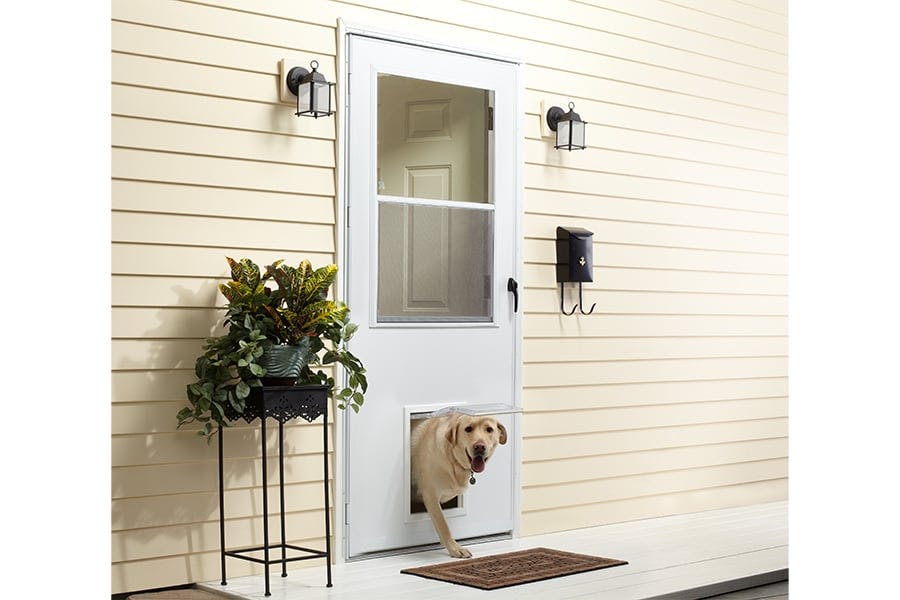
½ Light Panel Ventilating Storm Door
Want a combination of natural light, fresh air, and privacy — or room for a doggie door? This storm door’s for you! It has a glass panel that takes up half the door, built-in insect screens, and space at the bottom to include a doggie door, if desired. Doggie doors come in two sizes and are built into the door, so no extra setup is required!
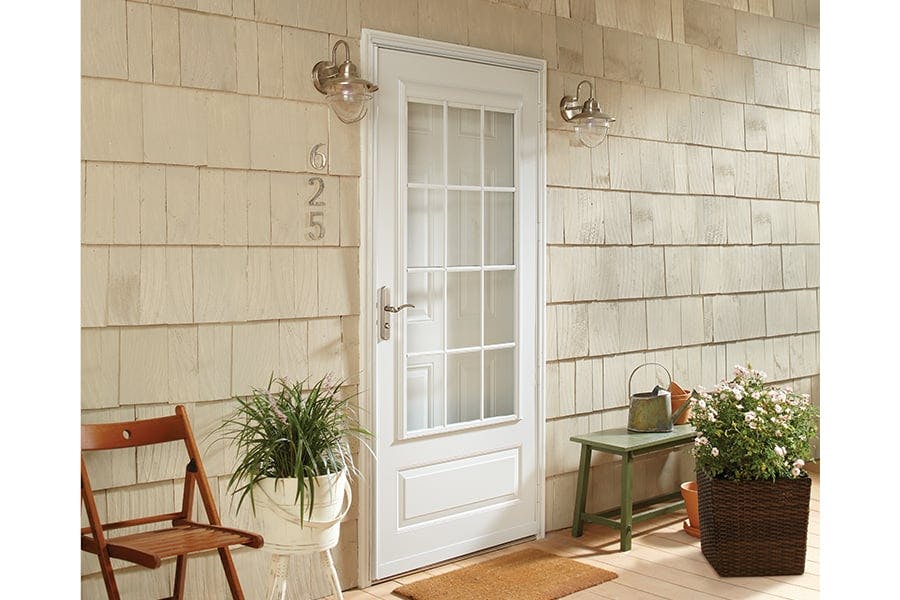
¾ Light Panel Ventilating Storm Door
This door has a glass panel that makes up ¾ of the door, so it still lets in plenty of natural light. It also has a built-in insect screen, so you never have to swap out the glass panel when it’s time to let in the spring breeze.
Dive into your options with this handy side-by-side comparison of all our ¾ Light Panel Ventilating Storm Doors.
Fullview Retractable Storm Door
If you want a storm door that has a full panel of glass and makes it extra easy to let in fresh air, this is your door. A retractable insect screen pulls down from the top and is so easy to operate, you only need one hand.
Get a side-by-side comparison of all our Fullview Retractable Storm Doors.

How to measure for a storm door
Ready to make the best small investment you could make in your home? The first step to adding a new storm door, or replacing an existing one, is measuring accurately. Here’s how to do that:
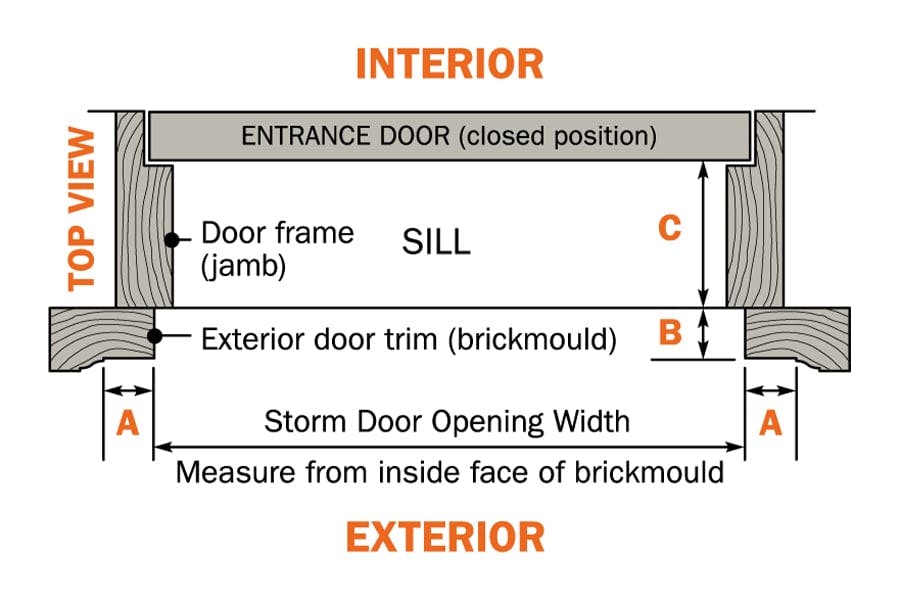
1. Check to make sure your door and trim allow space for a storm door. You can do that by taking the three measurements (A, B, and C) identified on the chart below.
A: Measure the width of the exterior trim. You need a minimum of ¾-inch flat trim on either side of the door to fit the storm door’s frame.
B: Measure the depth of the exterior trim. You need a minimum of 1-inch trim depth to install the hinges.
C: Measure the depth of your door frame. You need a minimum depth of 2 ½-inches to accommodate your front door’s hardware. Note: Depending on the depth and location of your entry door hardware, you might need additional clearance.
2. Measure to determine what size storm door you need.
Here’s how to do that:
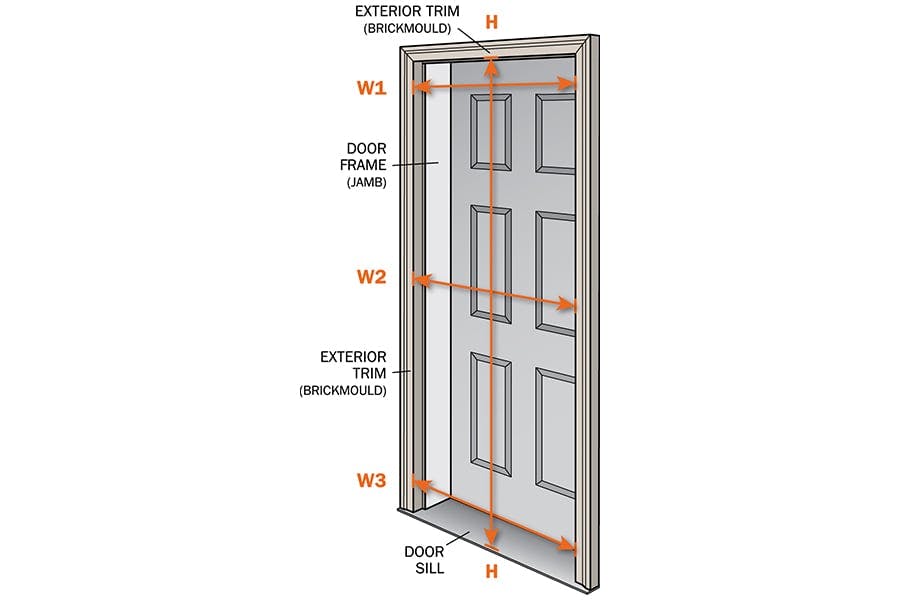
Standing on the exterior, measure the width from the inside face of the exterior trim in three different spots: near the bottom of the opening, at the center of the opening, and near the top of the opening. Record the smallest measurement and use that as your width.
Still standing on the exterior, measure the height of your opening from the door sill at the bottom to the trim on the top. Record your height.
Note: Custom sizes are available if you have an odd-size door.
4. Choose which side the door should open from (called the door handling).
Typically, if your front door opens from the right, you’ll want your storm door to open from that side too, and vice versa.
With these measurements in hand, you can start narrowing down your options. One other consideration that you’ll want to keep in mind is ease of installation — more on that in the next section.
How to install a storm door
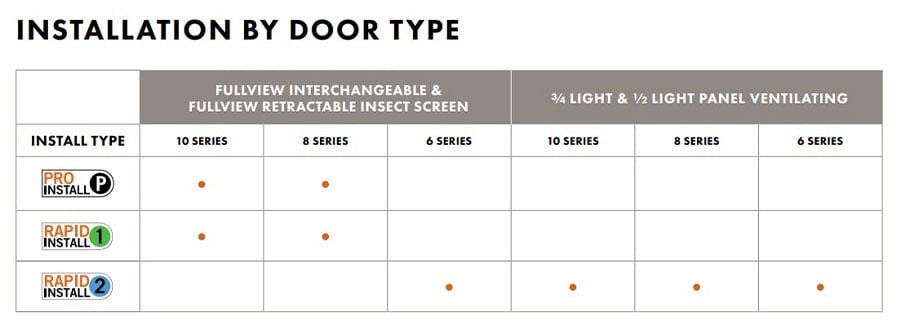
You can install your own storm door. We categorize all our storm doors according to ease of install, so you can pick the option that’s right for your level of handiness.
Here are the three levels:
- Rapid install 1 is the easiest type of storm door to install. It was designed with DIYers in mind, and it’s estimated to take less than an hour. The door is prehung, there’s no cutting, minimal drilling, and virtually no measuring needed.
- Rapid install 2 was also designed for DIYers, and it’s estimated to take two hours to install. The door comes unassembled but cut to length.
- Pro install is designed to be installed by a contractor. It comes unassembled and must be cut to length.